 Creating images of molecules in three dimensions seems at first to be simple enough, but there are some challenges. This is likely why people may either avoid doing so or use a plug-in script for specifically for this. I decided to try my hand at rendering some simplified models of macromolecules. I started with a standard stick-and-ball model of the DNA molecule in POV-Ray.
I started by creating a simple sphere that was offset from the origin along the X axis. This sphere represented a single base (adenine, thymine, cytosine, or guanine). I used a for-loop to place 100 of these. Each subsequent sphere was raised along the Y-axis a set amount. To place the bases of this single DNA strand in a spiral I determined the X and Z coordinates using a sine and cosine function. To visualize this, if you looked straight down at the X – Z plane you would see spheres around a circle. I created the bases along the second strand in the same way, except that I rotated them 180 degrees and made them a different color.
How the bases are placed along the spiral has consequences. Placing them individually avoids using a constructive solid geometry (CSG) function that creates a single object with 100 pieces, making it easier to invoke or move the entire set of spheres. However, it makes it more challenging to customize the individual spheres as they are now part of a single object. For example, if you wanted to randomly assign one of the four possible nitrogen bases to each sphere you would need to do this before the CSG operation.

To create the joins between the opposed bases I used a similar trick. I created a single cylinder that extended between the centers of the first two bases. I then used a for-loop to place 100 of these, each time rotating and raising it the proper amount. The spirals that represent the two stands linking the bases are sphere_sweeps rather than curved cylinders. These look great and are easy to use, but come with the cost of not being able to become part of a blob object, as spheres and cylinders are able to do.
 That is all that is necessary to create an image generic DNA molecule that can easily modified or animated. I wanted to make it look a little more organic using the blob object. This can create a new object with organic-appearing gradual transitions between spheres and cylinders. I created a single blob object from an opposing pair of spherical bases and a connecting cylinder.
I then used a for-loop to place 100 of these and sequentially increased the Y coordinate and rotated each one a set amount. I then added the two spiral strand objects created from the sphere_sweeps.
 One thing I found quite useful for turning different parts of the code on and off was to use #declare to give each element, e.g., 100 spherical bases, a short name to invoke. At the bottom of the POV-Ray code you can see where each element is invoked with an object() command or is turned off (// is the standard REM in POV-Ray, similar to # in R).
#include "shapes.inc"
#include "colors.inc"
#include "glass.inc"
#include "glass_old.inc"
#include "metals.inc"
light_source{<30, 200, -50> color rgb<1,1,1>*1}
camera{location<0,10, -10> look_at<0,10,0>}
#declare thing1 = sphere{<0,0,0>, 0.2 pigment{color Red} finish{ambient 0.3 specular 0.2} translate x*1};
#declare thing2 = sphere{<0,0,0>, 0.2 pigment{color Orange} finish{ambient 0.3 specular 0.2} translate x*-1};
#declare tjoin = cylinder{<-1,0,0>,<1,0,0>, 0.05 pigment{color Gray}};
#declare things1 = union{
#for (i, 1, 100, 1)
object{thing1 translate<0,i/2,0 > rotate y*i*15 }
#end
};
#declare things2 = union{
#for (j, 1, 100, 1)
object{thing2 translate<0,j/2,0 > rotate y*j*15}
#end
};
#declare crosslinks = union{
#for (k, 1, 100, 1)
object{tjoin translate<0,k/2,0> rotate y*k*15}
#end
};
#declare spiraljoin =
union{
#declare r = 1;
#declare P = 15;
#declare points = 100;
#declare pt = 1;
sphere_sweep{ b_spline points <0,0,0>, 3
#while(pt < points)
<r*sin((180+pt*15*pi)/180), pt/2, r*cos((180+pt*15*pi)/180)> 0.03
#declare pt = pt + 1;
#end
}
translate <0,-0.45,0>
pigment {color Gray}
finish { ambient 0.3 specular 0.2}
};
#declare thing3 =
blob{threshold 0.5
sphere{<0,0,0>, 0.6, .7 pigment{color Red} finish{ambient 0.3 specular 0.2} translate x*1}
sphere{<0,0,0>, 0.6, .7 pigment{color Orange} finish{ambient 0.3 specular 0.2} translate x*-1}
cylinder{<-1,0,0>,<1,0,0>, 0.15, .7 pigment{color Gray}}
};
#declare things3 = union{
#for (k, 1, 100, 1)
object{thing3 translate<0,k/2,0> rotate y*k*15}
#end
};
//object{things1}
//object{things2}
//object{crosslinks}
object{things3}
object{spiraljoin rotate y*20}
object{spiraljoin rotate y*200}
The only problem with my model was that it was still a simplification of an actual DNA molecule. It was an okay model, but I wanted to try making a more accurate model. I discovered an online database called Protein Data Base (PDB) that contained entries for many macromolecules and included data on the three dimensional coordinates and identities of atoms. I downloaded a file for DNA and imported it into R. I used base commands to create data.frame objects of the coordinates and of the atom identities. The former allowed me to generate a color vector for the atoms according to chemistry standards (CPK model).
library(rgl)
setwd("C:/Users/Jeff/Documents/Bugs_Maps_and_Math")
raw.data <- read.delim2("pdb1bna_justcoords.txt", sep="", header=FALSE)
#raw.data
names(raw.data)
coords <- raw.data[,7:9]
atoms <- raw.data[,12]
atom.col <- data.frame(atom.col=rep(NA,566))
atom.col[which(atoms=="C"),1] <- "black"
atom.col[which(atoms=="O"), 1] <- "red"
atom.col[which(atoms=="N"), 1] <- "blue"
atom.col[which(atoms=="P"), 1] <- "purple"
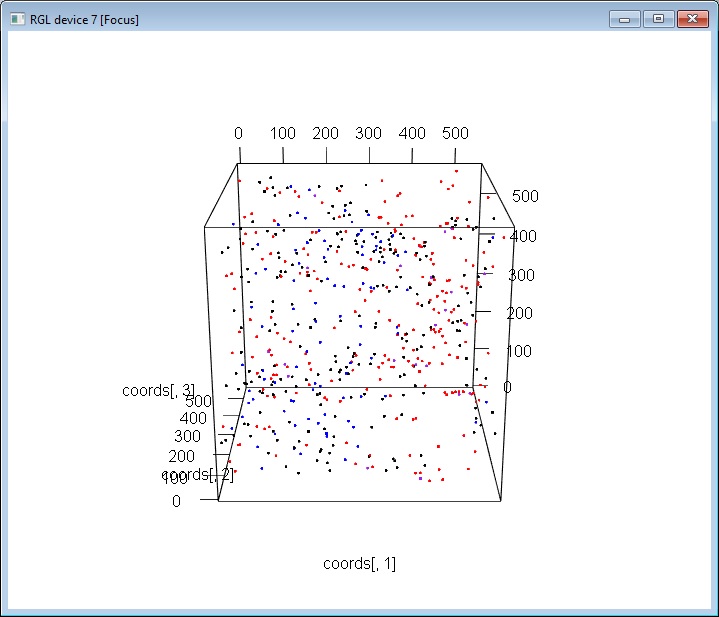
plot3d(coords[,1], coords[,2], coords[,3], col=atom.col[,1], pch=16)
The image I created using plot3d() from the rgl package did not look like DNA at all. I suspect this is because I have not include any linkages or even atom sizes.
I could pull these coordinates into POV-Ray and have some additional control over the way the atoms are represented, but as mentioned above, it would be best to not create separate CSG objects, but rather to have a loop go through each entry and plot them individually. If anyone has interest in seeing how to do this, or how to alter the code above in some other way just let me know. Otherwise, I am going to call this experiment in rendering macromolecules done for now.
